Building using Visual Studio
With the advent of CMake support in Visual Studio 2017 there are now two ways to build JSBSim and the various components using Visual Studio 2017. There is a standard set of Visual Studio project files (*.vcxproj) for the various components like the main JSBSim program, Aeromatic++, etc. and a solution file (*.sln) that references the various project files. Alternatively you can use the new CMake support to build JSBSim and the various components using CMake via Visual Studio.
Check out the JSBSim source tree using git. For these examples the source code has been checked out to:
C:\source\JSBSim
Building using VS 2017 Project Files
Use the File → Open → Project/Solution … menu option.
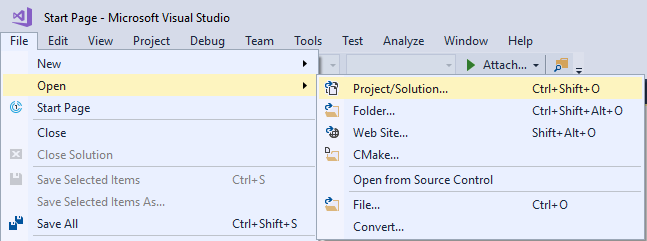
Browse to the location of the JSBSim source and select the JSBSim.sln in the root of the source code tree, in this example:
C:\source\JSBSim\JSBSim.sln
The project files have been configured to store the compiler and linker’s intermediate files and the final output files in a directory outside of the source code tree of JSBSim, i.e. outside of C:\source\JSBSim\src.

So for example the intermediate files for JSBSim and Aeromatic will be stored in the following directories:
C:\source\JSBSim\Debug\x64\JSBSim
C:\source\JSBSim\Debug\x64\aeromatic
The output files will be found in:
C:\source\JSBSim\Debug
Building using VS 2017 CMake Support
Use the File → Open → CMake … menu option.
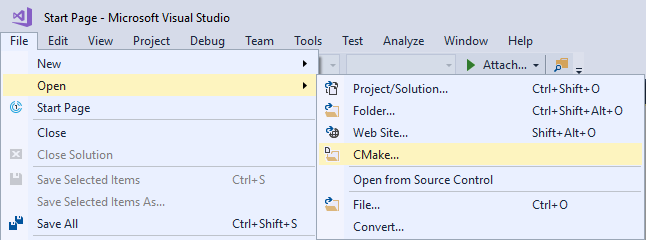
Browse to the location of the JSBSim source and select the CMakeLists.txt in the root of the source code tree, in this example:
C:\source\JSBSim\CMakeLists.txt
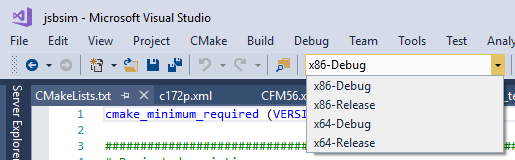
There are 4 build configurations in total, x86, x64 and Debug and Release versions for each. Select the build configuration you want to build.
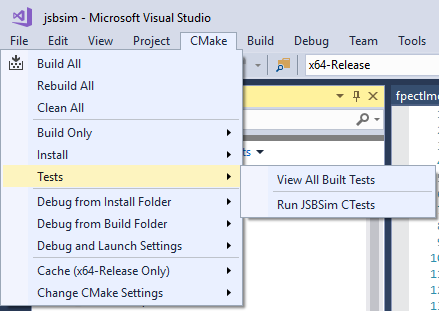
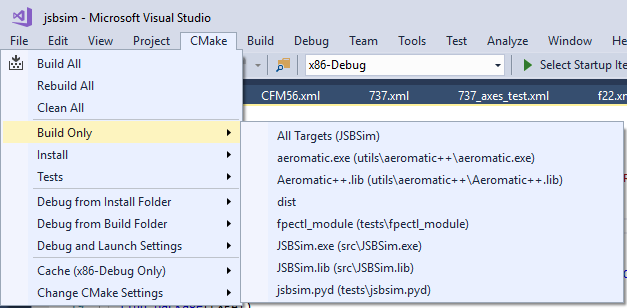
Then use the CMake menu option to decide which components you would like to build.
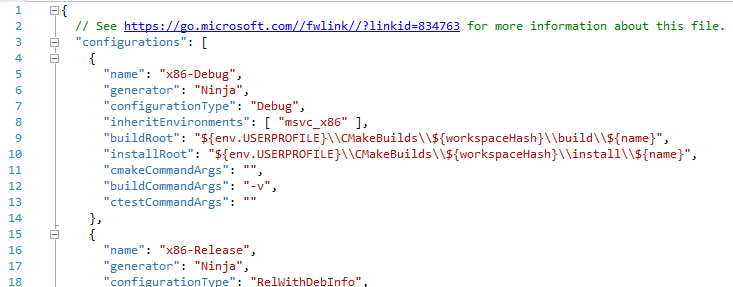
By default Visual Studio configures CMake to build outside the source tree, defaulting to a build directory in the user’s home directory and using a GUID (Globally Unique ID) as part of the directory path. You will see the generated path displayed in the Output window of Visual Studio, for example:
Working directory: C:\Users\Sean\CMakeBuilds\3f00c6d9-d323-5a32-8a90-665138817fd4\build\x64-Release
If for example you don’t want to use your home directory for your CMake builds then you can generate a CMakeSettings.json file by using the CMake → Change CMake Settings menu option and then editing the buildRoot and installRoot properties.
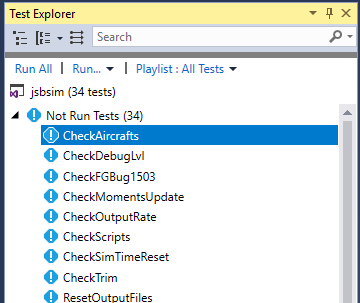
Lastly Visual Studio also supports the execution of the JSBSim tests.